Banana bread has made a comeback in our home and everyone is eating it all up. I also took notice to how cheap it was to make, and it lasts a while.
Choose the recipe that works best for you here: http://www.food.com/recipe-finder/all/banana-bread
Showing posts with label recipe. Show all posts
Showing posts with label recipe. Show all posts
Friday, February 3, 2012
Tuesday, January 24, 2012
A Very Yummy Scrub
Salt and Honey Scrub with Grapefruit and RosemaryFills about 6 half-pint jars. Shelf life 4 months.
2 cups olive oil
2/3 cup honey
1/2 teaspoon grapefruit essential oil
1/4 teaspoon rosemary essential oil3 cups salt
sugar (optional)
red food coloring
Mix the first 4 ingredients together in a bowl. Gradually mix in the salt 1/2 cup at a time. It's easiest to mix with your hands. Wear gloves if you have sensitive skin.
Continue to mix until the oil is mostly absorbed into the grains. It will be very thick and mass together with a bit of oil seeping out. If it's not coming together after several minutes, add salt or sugar in half cup increments until it's a gritty oily paste (you will need more salt/sugar if using kosher salt and less if using a finer grain salt).
Add 2 drops red food coloring and mix well. Add additional essential oil at a rate of 1/4 teaspoon at a time for a stronger fragrance.
Scoop the scrub into little jars with holes large enough to dig the product out by hand. Wipe off the top of the jar before lidding as the salt can rust the metal lid.
To use, scoop a tablespoon of the scrub into damp hands and massage between your hands until you feel a gritty paste. Scrub your face and body in a circular motion until most of the salt crystals dissolve, then rinse.

http://daringbakerduluth.blogspot.com/2012/01/salt-and-honey-scrub-with-grapefruit.html
Monday, January 23, 2012
Hollandaise Sauce, Simple Fail-Proof Recipe
I just love hollandaise sauce! I found and use the most simple recipe that there is and here it is:
2 sticks of unsalted butter
4 egg yolks
juice of 1 lemon
cayenne pepper to taste
Take the yolks of the eggs and put them in the blender and blend well. Melt the butter but do not brown. Add the melted butter to the blender while running at a very slow pace (taking about 30 seconds to add it all). Then add lemon juice and cayenne pepper to the mixture and make sure it is all blended well. Serve while still hot.
Enjoy!!!!!
Superbowl Recipe Contest Time!
We are doing a Superbowl recipe contest! Yay! Here is how it works:
Below this post add your recipe under the comment section. Original, new, tasty recipes only please (in otherwords don't submit a worn out recipe that gets made by half of the U.S. lol). If we pick your recipe, YOU WIN!
Now, get to posting your recipes folks and let's get ready for the Superbowl weekend.
Enjoy!
Thursday, January 12, 2012
Natural Beauty Remedies
In the Feb. 2012 issue of Woman's Day were some great natural beauty remedies. I am going to list some here worth checking out.
Have a pimple? Take fresh mint leaves and pulsate them in a food processor with 1 tsp. of lemon juice. Cover for 15 minutes, then rinse, twice a day.
Cellulite? 2 Tbsp. used coffee grounds (not decaf) and 4 tsp olive oil. Combine them and make a paste and spread on your trouble areas in strokes upward. Massage in for 2 minutes and then rinse. Best to do this in the shower and be careful of the shower floor being slick after the oil washes off.
Yellowed nails? Pour some ginger ale into a bowl and soak your nails for 10 minutes twice a week and then rinse.
Dark circles under your eyes? One small handful of fresh parsley with 2 Tbsp. of plain yogurt and combine in a food processor. Pulse until a smooth paste. Apply mixture generously to your under eye areas for 20 minutes before rinsing with warm water.
Face scrub needed? Take 4 tsp. of baking soda and 1 Tbsp. of water and form a paste. Let sit for 2 minutes. Wet skin and then massage in a circular motions avoiding eye areas. Rinse after a couple of minutes with warm water and end with a splash of cold water to close your pores.
Dry skin patches? Cut a lemon in half and rub on the area and rinse afterwards. It doesn't give any precautions, but avoid your eyes pretty please :)
Wednesday, January 11, 2012
Are You Pregnant Like Me? Homemade Belly Butter.
Ahhhhh YES! Will be making some for me and my other friends who are pregnant at the same time I am.
 Measure all ingredients, except vanilla, into a heavy saucepan. Warm mixture over low heat until cocoa butter and beeswax have melted (two to five minutes). Stir well.
 The butter will begin to thicken and harden immediately. It will look something like this after 10 minutes:
 Once completely cool, place lid on tightly and add a label. Then “wow” your friends at the next baby shower with a gift of homemade belly butter!
To help skin remain soft, rub a small amount onto the stomach daily. Upon application, it may appear oily, but will quickly be absorbed.
Wheat Germ Oil comes from the germ (or heart) of the wheat kernel. It is rich in vitamins A, D and E. Vitamin E is especially helpful in this belly butter as it aids skin cell formation and reduces scars such as stretch marks.
Wheat germ oil breaks down quickly and has a shelf life of about eight months. If you buy some, use it; don’t let it sit waiting for a special occasion (as I did). It can often be found in the refrigerated section at the health food store.
Wheat Germ oil should not be used by those with wheat or gluten allergies. Can be replaced in this recipe with sweet almond oil.
Sesame Seed Oil is naturally abundant in protein as well as vitamins A and E. It is a stable oil with a long shelf-life, making it a desirable addition to body care products. Sesame seed oil can be found in the cooking section of most grocery stores. Just don’t use “toasted” sesame seed oil, or you’ll smell like a stir-fry dinner.
Apricot Kernel Oil is a wonderful skin softener. It moisturizes and tightens skin without leaving an oily residue. This oil is mild enough to use alone around the eyes. It can be found at most health food stores.
Vitamin E Oil is well known for its moisturizing properties and is often used to reduce or prevent scar tissue. It is also an antioxidant and acts as a preservative in lotions and creams, hindering fatty ingredients from going rancid.
Some suggest it is best to avoid using straight vitamin E on the face as it may cause eye irritation.
Beeswax is naturally hydrating and is found in many body care products. It often comes as a hard block and needs to be grated or melted for measuring. It is also available in small beads, which eliminates the need for grating, but is more expensive. Beeswax adds a lovely golden color to this belly butter and is the main thickening agent.
Mama’s Belly Butter
This recipe is adapted from the Stretch Mark Cream in Natural Beauty at HomeTo make 4 ounces (I usually divide this between a couple of 2 oz jars) you will need:by Janice Cox (page 86).
1/2 cup cocoa butter
2 tablespoons wheat germ oil
2 teaspoons sesame seed oil
2 teaspoons apricot kernel oil
2 teaspoons vitamin E oil
4 teaspoons grated beeswax
2 teaspoons vanilla extract (optional)
Remove from heat and stir in vanilla, if using. Another option would be to add a few drops of essential oil such as those mentioned in this post.
Cool briefly then pour into jar(s). Leave lid off and allow to cool completely (this should take about an hour). It will look very runny at first:To help skin remain soft, rub a small amount onto the stomach daily. Upon application, it may appear oily, but will quickly be absorbed.
About the ingredients:
Cocoa Butter, derived from the cocoa bean, has a mild chocolate scent. It is also rich in vitamin E, and is an excellent skin softener. Wonderful for adding a creamy, luxurious texture to personal care products, cocoa butter can also be used alone. It typically comes in solid form, but melts at body temperature, allowing it to be readily absorbed into the skin.Wheat Germ Oil comes from the germ (or heart) of the wheat kernel. It is rich in vitamins A, D and E. Vitamin E is especially helpful in this belly butter as it aids skin cell formation and reduces scars such as stretch marks.
Wheat germ oil breaks down quickly and has a shelf life of about eight months. If you buy some, use it; don’t let it sit waiting for a special occasion (as I did). It can often be found in the refrigerated section at the health food store.
Wheat Germ oil should not be used by those with wheat or gluten allergies. Can be replaced in this recipe with sweet almond oil.
Sesame Seed Oil is naturally abundant in protein as well as vitamins A and E. It is a stable oil with a long shelf-life, making it a desirable addition to body care products. Sesame seed oil can be found in the cooking section of most grocery stores. Just don’t use “toasted” sesame seed oil, or you’ll smell like a stir-fry dinner.
Apricot Kernel Oil is a wonderful skin softener. It moisturizes and tightens skin without leaving an oily residue. This oil is mild enough to use alone around the eyes. It can be found at most health food stores.
Vitamin E Oil is well known for its moisturizing properties and is often used to reduce or prevent scar tissue. It is also an antioxidant and acts as a preservative in lotions and creams, hindering fatty ingredients from going rancid.
Some suggest it is best to avoid using straight vitamin E on the face as it may cause eye irritation.
Beeswax is naturally hydrating and is found in many body care products. It often comes as a hard block and needs to be grated or melted for measuring. It is also available in small beads, which eliminates the need for grating, but is more expensive. Beeswax adds a lovely golden color to this belly butter and is the main thickening agent.
Vanilla is included in this recipe to add a pleasant aroma. Since vanilla is purported to balance mood and reduce stress, it is a perfect fit for the expecting mother. If vanilla is not something you enjoy, omit it. You may leave the belly butter unscented or add a few drops of essential oil.
Monday, January 9, 2012
Money Saving Tips For 2012
I have looked into my finances with a fine tooth comb and decided I had many outlets of wasted money. So, I thought I would list, in no order, the things that I modified or eliminated to save money for my family.
1.) Clip and print the coupons of the items you use or will try for you family, and put them in some sort of organized fashion & put them in your purse. Take advantage of those sales, B1G1 items, and free items. Print your coupons on paper that is going to get thrown away. Turn it over and use the backside, no one cares :)
2.) Shop your insurance rates! So many companies have either gone up on their rates or stayed the same. With businesses competing for business in this economy...you will be shocked at the money you will save with another company for the same details on a policy. Take the time and do it. Also, check to see if you have full coverage on an automobile that is not worth much. If you do, you may want to reconsider just liability. Most likely your car will get totalled by an insurance company if anything happens to it if it is not worth much.
3.) Cell phone companies are running deals right now on free texts, data usage, etc. Their monthly rates are a savings of sizable amounts every month. Take that and times it by 12 and you might drop your mouth on what that would do for you at the end of the year ( extra house payment, car payment, savings, etc)
4.) Start carrying cash! Stop charging and using that debit card. Fees from banks can add up over a year and interest rates from credit cards. If you don't have it to spend at that time in your wallet, don't buy it.
5.) If you do have a credit card and pay it off at the end of each month, check your card for online buying malls/tools that earn you points or money back. If it is an item you are gonna buy anyway, then buy it online and save yourself the gas money and earn money as well. So many companies have free shipping, so take advantage of it and make it a win/win situation.
6.) Eliminate the magazine subscriptions and look for the free ones or check out the magazine or newspaper out online. You are paying for the internet, so use it to your advantage once again in this way. Most magazines give some sort of free online magazine.
7.) Buy yourself the coffee from the grocery store and quit buying it from the coffee shop! Think about it folks a coffee at $2.00 or a latte for $4.50 two times a week, and take that and times it by 52!!! That's a lot of money you are spending on something that is a luxury that can easily be done at home. Don't know how to make your favorite cup of coffee???? Look it up online, so many tools on making your cup of goodness in the morning.
8.) Ladies....manicures and pedicures. Yes, I love them, too...but, in between maintenance and polish can be done at home. You don't have to weed them out completely, but try to push yourself to buff and polish yourself while you are in the shower/tub already.
9.) Garage sale time! Clean out all those items you don't use and put them in a garage sale. Make the items that are cluttering up your home and that you don't use to work for you in the form of extra cash. Take that cash and pay it toward a credit card with a balance, car payment, or house payment. Spend it where it will work the most for you in the long run.
10.) Consignment sales for kids shoes and clothing. Face it, they don't wear them long and usually stay in really good shape. Sell the items your kids have outgrown, work the consignment sale to save on the fee associated with it, and purchase your kids new clothes from the sale as well. So much money is wasted on kids clothing that might get worn just a hand full of times...if that.
11.) I have looked online and found so many DIY home recipes for household cleaners that are also much safer and less toxic to use in your home. I have tried them all, and I have my favorites. You don't have to replace all your items you use, but try to replace some. The savings will add up!
12.) Put a sweatshirt and socks on and turn the thermostat down a degree or two to save money. So many times we run around in few clothes in the house when we can put an extra layer on and save some money. It is also a great time to snuggle up on the couch with a blanket :)
13.) Hot water heaters use an abundance of our energy usage. Turn them down a bit and use cold water when able to.
14.) This brings me to my next one, use cold water when washing your clothes ( when you don't need the hot) and reserve the hot for towels and sheets where it counts most.
15.) Contact your energy provider and find out when is the cheapest time of day to use your energy/electricity in your home. If you have timers on your dishwasher, washing machine, etc., set the timer and wash them while you are asleep if the usage cost is less while you are sleeping :)
16.) Hair cuts, now don't get mad yet, hear me out....lol....if your kids need just a trim on the bangs or the ends of their hair, whoop out the shears and get to it yourself. If your husband tends to have a buzz cut or short hair cut all year or part of the year, use his trimmers to cut his hair. I do my husband's hair during the summer since he works outside and usually wants as little as possible up there :) Now for the ladies, hair cuts and colors can be extremely expensive. I have found that I can push getting my hair cut from 5/6 weeks to approximately 8 weeks or so. I eliminated my highlights and just opted for color since it was cheaper. Then, I took that one step further and found a color that was store bought that I really like. Ask your hairdresser what their opinion is on the best store bought variety (ex. permanent/ washout color and brand) and color they think would be closest to your color. If you have to buy the ones you think will work and take them with you to your next haircut. Everyone knows people are trying to save as much money as possible and I am sure they would like to keep you as a customer and at least keep cutting your hair for you :) Let them help guide you to the appropriate color for your hair color needs.
17.) Eating out is one of American families biggest expenditures. Start by counting how many meals per day, per person in your family, are purchased away from home. Then total them up at the end of the week or 7 days, and total up the receipts. You will be furious at the amount of money you see being wasted, especially if you are not bringing your leftovers home with you. If you can avoid eating out and take something from home, then do it by all means! Start checking out the Crock Pot recipes that can be cooking while you are at work or away from your home and look up those great casserole recipes that can typically feed a family for a couple of days. Folks purchase some gift certificates from your local grocery store if it benefits you in gas points, etc. Also, check out restaurant.com for any local restaurants that you enjoy. Most gift certificates run $2-$5 dollars for $25 worth of food. Just check for their coupon codes to get the extra money off at checkout. They run them allllll the time :)
18.) Stop wasting money on groceries that are getting thrown out due to spoilage, etc. Start making a list once a week of the items you are going to cook or need that week and buy only those things that are on the list. Force yourself to make that meal on that day. Most people stock up a pantry and end up not using most of the items in it and then end up going out of date (this is much more so in the refrigerator). If you are one of those people, start using up what you have and buy less. Get your pantry down to a skinny, non-cluttered look and start a shelf with bins/box with Monday through Sunday on it. Put the items needed for that meal in the bin along with the recipe, if needed, and pull it out when it is time to cook. You will find it a much more organized way and much less stress/ frustration when trying to figure out what to cook that night. :)
19.) Plant a garden when able, even if you don't have any space to put one..use pots. There are so many things that can be planted at home that can add up real quick at a grocery store. Tomatoes are expensive folks! Plant a couple in a pot or two and keep them watered. Do you have a neighbor who has a garden? Trade out time in their garden for some produce. Even so much as you purchase the seeds, use their land, and work the garden together. Work something out, because where there is a will there definitely is a way.
20.) Cable! Whew is it expensive. Eliminate the channels/packages that you don't use very often. Also, eliminate tv boxes that you are renting in rooms that don't get used much. Designate a tv room and if necessary a movie room. Rent your movies from the $1 rental boxes and return them on time. It is much cheaper to purchase the movies you WANT to see than pay for all the ones you don't. You might even want to try a subscription to a movie rental network, such as Netflix and Blockbuster online.
I really hope this helps each of you. This is really just things that I have done here at my house and have seen an increase in our extra cash. Don't feel the need to do all of these at once. Just incorporate a few and then maybe add another one. Hope 2012 finds you all happy and healthy. Enjoy!
Heather
More DIY Baby Products and Solutions
Lots of suggestions, recipes, and items here for the baby and it's all natural....Enjoy
http://simpleorganic.net/natural-homemade-baby-care-recipe-baby-massage-oil/
http://simpleorganic.net/natural-homemade-baby-care-recipe-baby-massage-oil/
Friday, January 6, 2012
Non-Petroleum Jelly
So, petroleum jelly is getting a second look because it is made from petroleum. So many items are made with petroleum jelly that we use, such as vapor rub, vaseline, diaper rash rub, lip gloss, and more. So my question is...why not use a better variety? Well, here you go courtesy of: http://adelightfulhome.com/day-2-make-your-own-non-petroleum-jelly/ Enjoy!

Kids will enjoy watching the mixture harden from the bottom up (I know I did).
Once completely cool, add lid and close tightly.
If you want a soften consistency, add more beeswax. It’s okay to remelt the jelly after it has hardened. Just keep working on it until you are happy.
Some ways to use your homemade, non-petroleum jelly:
How to Make Non-Petroleum Jelly
Ingredients
1/8 cup grated beeswax (about 1 ounce)
1/2 cup olive oil
Method
Combine beeswax and oil in a small saucepan. Melt over very low heat or in the top of a double boiler.
Pour into a jar to cool.
Kids will enjoy watching the mixture harden from the bottom up (I know I did).
Once completely cool, add lid and close tightly.
If you want a soften consistency, add more beeswax. It’s okay to remelt the jelly after it has hardened. Just keep working on it until you are happy.
Some ways to use your homemade, non-petroleum jelly:
- To smooth dry patches of skin
- To provide a protective layer or barrier
- Around your hairline when coloring your hair so the color doesn’t get on your skin.
- As a lip gloss
- Any way in which you might use a petroleum based jelly, like Vaseline.
Thursday, January 5, 2012
Homemade Vicks Vapor Rub
Still dealing with the little ones illness and started looking even more in depth. As always, consult a physician first.
Pour 2 ounces of almond or olive oil into a small bowl or cup.
Add 20 drops of essential oil – choose eucalyptus, hyssop, thyme, peppermint, basil, or rosemary.
This recipe comes from An Encyclopedia of Natural Healing for Children and Infants, by Mary Bove, N.D. page 286.
Voila! So easy and simple. Enjoy!
Wednesday, January 4, 2012
Homemade Pedialyte
As with anytime something comes up in my house I start looking for a solution or a way to do it myself. So with that said, we have a sick child right now, and I was floored at the cost of Pedialyte. A little research shows several variations of this recipe, but for the most part it stays the same. As with anything that deals with your child, consult your doctor prior to giving to your child.
Homemade Pedialyte
Homemade Pedialyte
1/2 tsp. baking soda
1/2 tsp. table salt
1/2 tsp. potassium salt
3 tsp. sugar (or flavored kool-aid, NOT sugar free)
Mix it all with 1 liter water
Version #2
4 cups water
1/2 teaspoon salt
2 tablespoons sugar
1/2 teaspoon Jello gelatin powder
Mix it all together.
Hope these help in your healing process of the sick little ones. Enjoy!
1/2 tsp. table salt
1/2 tsp. potassium salt
3 tsp. sugar (or flavored kool-aid, NOT sugar free)
Mix it all with 1 liter water
Version #2
Mix it all together.
Hope these help in your healing process of the sick little ones. Enjoy!
Thursday, December 15, 2011
My Favorite Tea Even For Winter Parties
I just love fruit tea, such a great change to a typical tea recipe and really is perfect for parties.
 3 Reviews http://www.food.com/recipe/fruit-tea-163369
Fruit Tea
By CaramelPie on April 07, 2006
3 Reviews 
- Prep Time: 10 mins
- Total Time: 10 mins
- Serves: 8-12, Yield: 1.0 gallon
Ingredients
- 6 -8 cups water
- 3 large tea bags
- 1 cup sugar
- 6 ounces frozen lemonade concentrate
- 12 ounces frozen orange juice concentrate
- 46 ounces pineapple juice
Directions
- Boil water, pour over tea bags, and steep for 5 minutes.
- Add other ingredients plus enough water to make 1 gallon.
- Stir and serve.
Tuesday, December 13, 2011
Homemade Relaxation ...Bath Fizzies
Tools and Materials
- Baking soda
- Cornstarch
- Citric acid
- Spritzer bottles
- Food coloring
- Glass bowl
- Essential oil
- Baking molds
Bath Fizzies How-To1. Sift 1 3/4 cup baking soda, 1 cup citric acid, and 2 cups cornstarch through a sieve to remove chunks. To make different tints, fill small spritzer bottles with water and add about 6 drops of food coloring to each.
2. Pour 1 cup of powdered mixture into a glass bowl. Lightly spritz, stirring after each spritz, until powder is desired color. Add water slowly, so mixture does not fizz. If mixing two tints, alternate colors as you spritz. Check the consistency of powder with your fingers; when it can be tightly packed or shaped, stop spritzing (this may take a little while).3. Select an essential oil. Add 5 drops if it's one of the stronger scents (peppermint, lavender), 6 if it's a weaker one (lemon, grapefruit). Mix well. Firmly pack mixture into small baking molds. We used 1/4 cup for each fizzy, which is good for one bath. Allow mixture to set for 2 hours, then pop out carefully. Repeat with different tints for remaining powder.

http://www.marthastewart.com/280275/how-to-make-bath-fizzies?backto=true&backtourl=/photogallery/bath-and-spa-gifts
Monday, December 5, 2011
If You Are A Parent, This Is A Recipe You Can't Afford To Skip!
When my 6 year old was spending most of her first year at Vanderbilt Hospital, we had a diaper rash occur while there and WOW did the nurses give us a recipe that should never be lost! Well, we lost it, and it took my sweet niece being here for a visit to find the recipe again courtesy of our pediatrician. YAY! Even if you are not a parent, I am sure you know someone who is that could use this. I have in the past made a recipe card and bought all the ingredients for a new mom for a shower gift. Now, I have a word of CAUTION!, there are recipes out there that claim to be this recipe, but they are not. Some of the ingredients that were given to us (and stressed to be the exact ones) are not the ones that are being published by other blogs or posts. Please make sure to follow exactly, it is very important the right ingredients get used.
As always, it is important to ask your doctor if it is ok to use any product or medicine on a child.......
So here it is!!!!
HAPPY HINEY DIAPER RASH CREAM!
mix all ingredients thoroughly in equal parts in an airtight container
1 Tbsp. of Aquaphor or Butt Paste (generic is fine just make sure the same ingredients)
1 Tbsp. of Monistat (generic is fine)
1 Tbsp. of 1% Hydrocortisone ointment (not cream)
1 Tbsp. of original (not mint) Maalox
Use with each diaper change until diaper rash is gone. Important message from me, Do Not dip your finger in the container each swipe you put on your child....you are contaminating the jar. My advice is to use a sterile popsicle stick or something similar to put to your hand and then your hand to your child's skin.
I hope that this helps each mother when the dreaded diaper rash appears.
Wednesday, November 30, 2011
Remember Making Salt Dough Ornaments in School?
I remember making these ornaments in school, and they were so fun! My mother still has the ornaments we made, and she still hangs them on the tree. What a great thing to keep and collect to pass on later to your child. I think I am going to make two of each child's ornaments. This way I can keep one forever and can pass one along to them when old enough.
4 cups of flour
1 cup salt
Food coloring
Large Mixing Bowl
Water to moisten
cookie sheet
just a tad of oil
a small rolling pin or wooden dowel
a drinking straw
ribbon
a plate for a guide
paint *if desired
*My goal for this batch was to do a handprint with both twins' hands on one keepsake & then to have a separate one for each.* This recipe had enough to make 3 keepsakes. Depending on the size & how many kids you have, you may need to double the recipe.*
 In your mixing bowl ~ gradually blend in your flour & salt with water.
  It was easier for me to lightly grease my baking sheet with oil & form & roll out on the cookie sheet. Once you have your form made, I suggest you use your straw to make a whole in it before you have your kids emboss their hand print.
  Keep in mind you need to have your dough thick enough to form the handprint. If your dough is too thin, it will not work. Place in a 150* degree oven for an hour. Or you can air dry over night & for 24 hours.
Credit: http://www.bystephanielynn.com/2010/11/salt-dough-hand-print-ornament-by.html
4 cups of flour
1 cup salt
Food coloring
Large Mixing Bowl
Water to moisten
cookie sheet
just a tad of oil
a small rolling pin or wooden dowel
a drinking straw
ribbon
a plate for a guide
paint *if desired
*My goal for this batch was to do a handprint with both twins' hands on one keepsake & then to have a separate one for each.* This recipe had enough to make 3 keepsakes. Depending on the size & how many kids you have, you may need to double the recipe.*
 In your mixing bowl ~ gradually blend in your flour & salt with water.
 *Remember to add gradually, because you can always add more water then takeaway.*
It was easier for me to lightly grease my baking sheet with oil & form & roll out on the cookie sheet. Once you have your form made, I suggest you use your straw to make a whole in it before you have your kids emboss their hand print.  Keep in mind you need to have your dough thick enough to form the handprint. If your dough is too thin, it will not work. Place in a 150* degree oven for an hour. Or you can air dry over night & for 24 hours.
Credit: http://www.bystephanielynn.com/2010/11/salt-dough-hand-print-ornament-by.html
Tuesday, November 29, 2011
Crock Pot Meal That's Super Tasty!
With the morning sickness that seems to fall afternoon and night, my dinners have become quite puny :) So, I found a Crock Pot meal that I tweaked, and it was absolutely delicious! So, here is it:
Ingredients:
1 can of Campbell's Cream of Mushroom Soup
1 can of Campbell's French Onion Soup
4 chicken breasts
1 envelope of Italian Seasoning/Dressing Mix
1 1/2 cups of white cooking wine
1 Tbsp. of chives
1 8oz. package of cream cheese
Egg noodles or Rice
Directions:
In your Crock Pot put your two soup mixes and stir/blend well. Then, add your Italian dressing mix and mix/blend well. Next, add your chicken breasts, chives, and white wine. Cook on high for 4 hours or low for 7-8 hours. Thirty minutes before serving, add the cream cheese (cut into chunks so it melts easier) and stir until it is completely melted. Finally, serve over egg noodles or rice (whichever you prefer) and ....
Enjoy!
Monday, November 21, 2011
Scents of The Season
There is nothing better than walking around in your home and smelling Christmas all around you. So, I have found several recipes for simmering potpourri for your home to do for yourself or as gifts. Enjoy!
Fruity-Fresh Simmering Potpourri
Christmas-y Simmering Potpourri
Credit: http://www.curbly.com/users/diy-maven/posts/2588-easy-homemade-simmering-potpourri-recipes
Spicy Simmering Potpourri
- 1 oz. can cinnamon sticks, broken into small pieces
- 1 (1.12 oz.) can whole cloves
- 1 (1.25 oz.) can whole allspice
Fruity-Fresh Simmering Potpourri
- 1 lemon
- 1 orange
- 3-3 inch cinnamon sticks
- 6 bay leaves
- ½ cup whole cloves
Christmas-y Simmering Potpourri
- 3 cinnamon sticks
- 3 bay leaves
- 1/4 cup whole cloves
- 1 teaspoon ground cloves
- 2 tablespoons dried lemon peel
- 2 tablespoons dried orange peel
- ½ teaspoon ground nutmeg
Credit: http://www.curbly.com/users/diy-maven/posts/2588-easy-homemade-simmering-potpourri-recipes
Edible Simmering Potpourri
Apple cider to fill a large soup pot
One apple, cut horizontally to make circular round slices 1/2-inch thick
One orange, cut into round slices 1/2-inch thick
3 whole cinnamon sticks
6 whole cloves
6 whole allspice berries
One 2-inch piece of fresh gingerroot, cut into small rounds Place all ingredients in a large soup pot and bring to a simmer, then reduce and allow to simmer uncovered, adding cider as liquid evaporates.
When guests arrive, ladle out a mug full of the hot cider for each person, adding a splash of bourbon or brandy, if you like, and serve with an additional cinnamon stick in each mug.
3 bay leaves
1/4 cup whole cloves
1 teaspoon ground cloves
2 lemon slices, fresh or 2 tablespoonsdried lemon peel
2 tablespoons orange peel or dried orange peel
1/2 teaspoon ground nutmeg
1 quart water
Apple cider to fill a large soup pot
One apple, cut horizontally to make circular round slices 1/2-inch thick
One orange, cut into round slices 1/2-inch thick
3 whole cinnamon sticks
6 whole cloves
6 whole allspice berries
One 2-inch piece of fresh gingerroot, cut into small rounds Place all ingredients in a large soup pot and bring to a simmer, then reduce and allow to simmer uncovered, adding cider as liquid evaporates.
When guests arrive, ladle out a mug full of the hot cider for each person, adding a splash of bourbon or brandy, if you like, and serve with an additional cinnamon stick in each mug.
Christmas Simmering potpourri
Simple and great smelling. I like to mix the dry ingredients up in little Ziploc's to have them ready to add to water during the holiday season.
3 cinnamon sticksSimple and great smelling. I like to mix the dry ingredients up in little Ziploc's to have them ready to add to water during the holiday season.
3 bay leaves
1/4 cup whole cloves
1 teaspoon ground cloves
2 lemon slices, fresh or 2 tablespoonsdried lemon peel
2 tablespoons orange peel or dried orange peel
1/2 teaspoon ground nutmeg
1 quart water
Mix all ingredients in medium saucepan. Simmer on low heat. Add more water as needed.
Spicy Simmering potpourri
* 3 1/2 cups anise star, whole
* 1 3/4 cups allspice, whole
* 1 3/4 cups orange peel
* 1 3/4 cups juniper berries
* 1 3/4 cups nutmeg, whole
* 1 3/4 cups cloves, whole
* 3 1/2 cups cinnamon chips
* 1 3/4 cups lemon peel
* 3 1/2 cups rosehips
* 3 handfuls bay leaves, whole
Use oil fragrances such as French vanilla, old world spice, and vanilla fragrance. This recipe makes 24 cups.
Citrus Simmering potpourri
* 1 cup cinnamon sticks, whole, 1"
* 1 cup orange petals, whole
* 1/4 cup lemon or grapefruit peel
* 1/8 cup allspice, whole
* 3 cups lemon verbena leaves, whole
* 1 cup chrysanthemum flowers, whole
* 1 3/4 cups orange peel, cut and sifted, 1/2" - 3/4"
* 1/8 cup cloves, whole
* 2 cups lemongrass 1/2" cut
For oil use 1/8 ounce lemon essential oil, 1/2 ounce sweet orange essential oil, 1/8 ounce tangerine essential oil, and 1/8 ounce cinnamon bark essential oil. This recipe makes 12 1/2 cups.
Floral Simmering potpourri
* 1 cup rosebuds and petals, pink
* 1 cup rosebuds and petals, red
* 1 cup Balm of Gilead buds, whole
* 1 1/2 cups orange peel, cut and sifter, 1/2" - 3/4"
* 16 nutmegs, whole, cracked with a hammer
* 1 cup oak moss
* 1/4 cup allspice, whole
* 2 cups cinnamon chips
* 1 vanilla bean, cut into small pieces
* 1/4 cup fenugreek seeds, whole
* 1/4 cup cloves, whole
Use 3/4 ounce of your favorite floral fragrance oil. This recipe makes 8 1/2 cups.
Fruity Simmering potpourri
* 1 1/2 cups orange peels, cut and sifted, 1/2" - 3/4"
* 1 cup anise star, whole
* 1/4 cup cardamom pods
* 2 cups cinnamon chips
* 1 cup apple pieces
* 1/2 cup mace, whole
* 1/4 cup allspice, whole
* 1/4 cup cloves, whole
For oil, use 1/2 ounce apple fragrance, 1/8 ounce cinnamon bark essential oil OR use 3/4 ounce spicy apple fragrance. This recipe makes 6 3/4 cups.
Wednesday, November 16, 2011
From Scratch, Moisty Yellow Cake Mix....YUM!
I was sent this website, and I have to say I am extremely glad I received it. I shall share with you :)
Tuesday, November 11, 2008
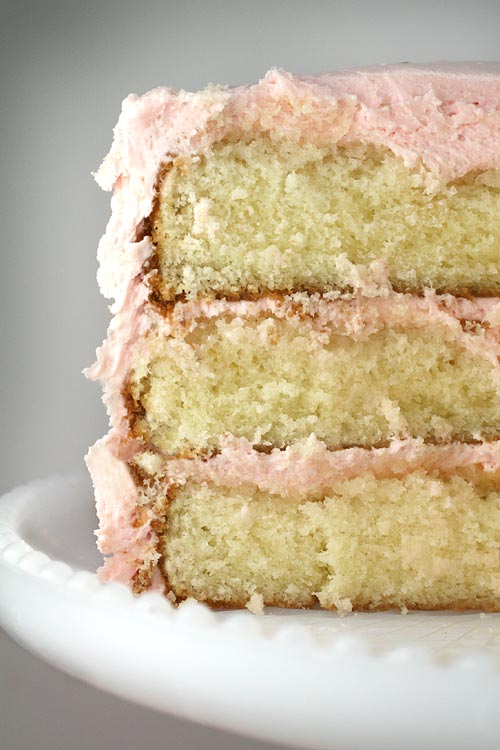
A moist yellow cake recipe. (Actually, I asked for it.) I have been on the hunt for a moist yellow scratch cake recipe since I started this site. I’ve tried several in the past, like the Butter Cake recipe from The Cake Bible (a great baking resource, by the way). And, while the taste was really good, I’ve been having a time trying to get the recipe to come out as moist as I like. I finally came to the conclusion that it must be my gas oven that’s the problem. At least, that’s what I’ve been telling myself.
So, the hunt was on. It was a short search that began and ended with my friend’s mom. She used to own a bakery and made the yummiest cakes. So, I thought I would ask the pro for help. And, I’m so glad I did. It was yellow and moist, but mostly delicious. Thanks for the recipe, Shirley! I guess I’ll have to come up with another reason to trade my gas oven in for an electric one. Here’s the recipe:
Moist Yellow Cake
1 cup (2 sticks) of butter (room temperature)
2 cups of sugar
4 eggs (room temperature)
3 cups of sifted self-rising flour (White Lily)
1 cup of whole milk (room temperature)
1 teaspoon pure vanilla extract (McCormicks)
1/2 teaspoon butter flavoring
Cake assembly:
1 teaspoon pure vanilla extract
1 1b. 10X powdered sugar
1-3 teaspoons milk, half and half or cream

P.S. I’ve been using aluminum cake pans instead of the dark coated kinds you find in the grocery store. They also come in many different sizes.
http://www.bakerella.com/finally-i-found-it/
Tuesday, November 11, 2008
Finally, I found it!
A moist yellow cake recipe. (Actually, I asked for it.) I have been on the hunt for a moist yellow scratch cake recipe since I started this site. I’ve tried several in the past, like the Butter Cake recipe from The Cake Bible
(a great baking resource, by the way). And, while the taste was really good, I’ve been having a time trying to get the recipe to come out as moist as I like. I finally came to the conclusion that it must be my gas oven that’s the problem. At least, that’s what I’ve been telling myself.So, the hunt was on. It was a short search that began and ended with my friend’s mom. She used to own a bakery and made the yummiest cakes. So, I thought I would ask the pro for help. And, I’m so glad I did. It was yellow and moist, but mostly delicious. Thanks for the recipe, Shirley! I guess I’ll have to come up with another reason to trade my gas oven in for an electric one. Here’s the recipe:
Moist Yellow Cake
1 cup (2 sticks) of butter (room temperature)
2 cups of sugar
4 eggs (room temperature)
3 cups of sifted self-rising flour (White Lily)
1 cup of whole milk (room temperature)
1 teaspoon pure vanilla extract (McCormicks)
1/2 teaspoon butter flavoring
- Preheat oven to 350 degrees.
- Grease and flour (3) 8 inch cake pans.
- Using a mixer, cream butter until fluffy.
- Add sugar and continue to cream for about 7 minutes.
- Add eggs one at a time. Beat well after each egg is added.
- Add flour and milk (alternating to creamed mixture), beginning and ending with flour.
- Add vanilla and butter flavoring to mix; until just mixed.
- Divide batter equally into three cake pans.
- Hold each layer about 3 inches above your counter and carefully drop the pans flat onto counter several times to ensure release of any air bubbles. This will help you have a more level cake.
- Bake for 25 – 30 minutes (depending on your oven) until done.
- Cool in pans for 5 – 10 minutes.
- Remove and immediately wrap each layer in plastic wrap to seal in moisture. Cool completely on wire racks.
- Once cooled, you are ready to assemble your cake.
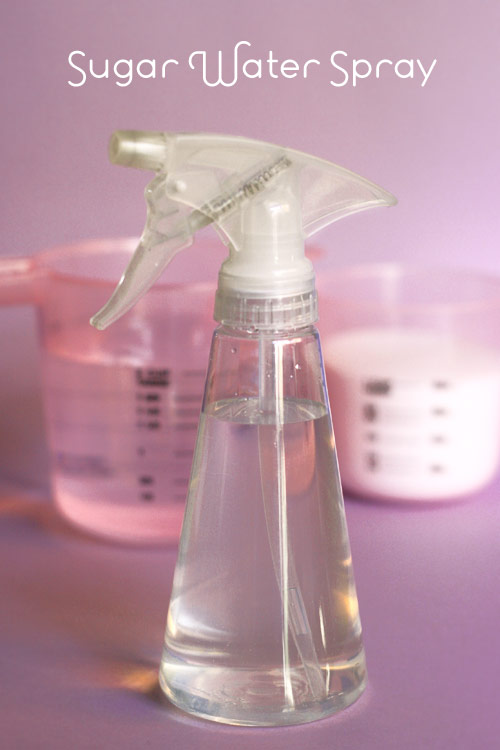
- Combine 1 cup of sugar and 2 cups of water.
- Bring to boil and boil for approximately 3 minutes. Let cool.
- Pour liquid into a spray bottle or pouring bottle.
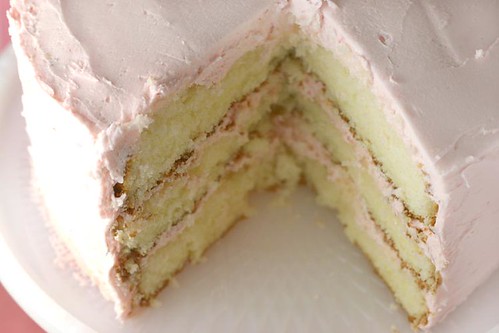
Cake assembly:
- Unwrap first layer and using a serrated knife, level off the top of your cake.
- Place layer onto your dish. Take a straw and poke holes into the layer. Using your spray bottle, spray top of layer several times; enough to give it a little moisture. Be careful – don’t add too much.
- Add a layer of frosting to your bottom layer. Repeat on second and third layers.
- Frost the sides.
1 teaspoon pure vanilla extract
1 1b. 10X powdered sugar
1-3 teaspoons milk, half and half or cream
- Using a mixer, cream softened butter and vanilla until smooth.
- Add sugar gradually, allowing butter and sugar to cream together before adding more.
- If you want your frosting a little creamier, add a teaspoon of milk at a time and beat on high until you get the right texture.
- Then, just use icing colors
P.S. I’ve been using aluminum cake pans
instead of the dark coated kinds you find in the grocery store. They also come in many different sizes.http://www.bakerella.com/finally-i-found-it/
A Very Unique Appetizer or Snack
Ok, I will warn you if you have not had these before this will seem very strange, but if you have had them you know how wonderful they are. Don't shrug it off, because kids love them!
Ham and Dill Pickle Appetizer Bites
dill pickles
thin deli ham slices or corned beef or just experiment with your favorite meat
cream cheese
"Let the cream cheese sit at room temperature for at least 30 minutes before you make these.
Cut dill pickles lengthwise into fourths or sixths, depending on how thick the pickles are. You need as many cut pickle spears as you have ham slices.
Spread each slice of ham with a very thin layer of cream cheese. (I used about 1 tsp. cream cheese on each ham slice. The ham doesn't need to be completely covered with cream cheese.)
Put a dill pickle on the edge of each ham slice and trim the ham if it's very much bigger than the dill pickle spear. Roll up the ham around the dill pickle, then place toothpicks where you want each piece to be cut. Cut into pieces so that each piece has a toothpick. Arrange on plate and serve."
http://www.kalynskitchen.com/2011/02/easy-recipe-for-ham-and-dill-pickle.html
Onion Soup Mix Recipe
We use it in sour cream for onion dip mix and we use it in dinner recipes. Enjoy!
Ingredients:
2/3 cup minced onion
3 teaspoons parsley flakes
2 teaspoons onion powder
2 teaspoons turmeric
1 teaspoon celery salt
1 teaspoon sea salt
1 teaspoon sugar
1/2 teaspoon fresh ground pepper
Directions:
Mix all ingredients together well in an air tight container or jar. Use 4 Tbsp. to equal the amount of one store bought dry package.
Subscribe to:
Posts (Atom)